Blokees® Community


How to Fix Loose Joints on Your Marvel Action Model Kits
Most loose joints respond to one of three approaches: a thin layer of PVA-based hobby glue applied to the joint interior, a small rubber shim cut from a latex glove, or a careful rebuild of the joint using the instruction booklet as a reference for correct alignment.
Marvel collector kits — especially high-articulation poseable kits — are designed for repeated posing over years. Browse the Marvel Toys lineup to see the joint designs involved. The best approach depends on what type of joint is loose and how severely.
The three-second joint test
-
Hold the kit by the torso. If a limb drops or drifts under its own weight, the joint is loose.
-
Pose and release. A properly tensioned joint holds a pose when you let go. A loose joint returns to neutral.
-
Flex test. Gently move the joint through its full range. Resistance should be even throughout. No grinding, no slipping.
What Are Marvel Collector Kits?
Marvel collector kits are pre-painted snap-fit poseable kits designed for display and collector use. The Marvel universe spans comics, games, and film — the Marvel Comics catalog dates to 1939 and includes thousands of characters. Kits based on these characters range from static display pieces to high-articulation poseable designs with 30–77 individual joint points.
The Marvel Champion Class lineup is an example of the high-articulation format: game-accurate designs with multi-joint construction across shoulders, elbows, wrists, hips, knees, ankles, and the torso. More joints mean more posing freedom — and more joints that can loosen over time.
Joint types in collector kits
|
Joint type
|
Location
|
Prone to loosening?
|
|
Ball-and-socket
|
Shoulders, hips, torso
|
Yes — high rotation range causes wear over time
|
|
Hinge
|
Elbows, knees, ankles
|
Moderate — limited range reduces friction wear
|
|
Swivel
|
Wrists, waist, neck
|
High — frequent rotation causes smooth-out faster
|
|
Ratchet
|
Some shoulder designs
|
Low — ratchet tension is more durable long-term
|
|
Snap-fit post
|
Accessory attachment points
|
High — repeated detaching and reattaching wears the post
|
Why Do Joints Get Loose Over Time?

Loose joints are not a defect in most cases. They are the natural result of using a poseable collector kit the way it was designed to be used.
|
Cause
|
Explanation
|
|
Repeated posing
|
Every time a joint moves, a small amount of material wears from the contact surface. The tighter the fit originally, the more noticeable the difference becomes.
|
|
Thermal cycling
|
Plastic expands slightly in warmth and contracts in cold. Kits stored near heat sources or in varying-temperature rooms experience this repeatedly. The joint interior gradually changes dimensions.
|
|
UV exposure
|
Direct sunlight degrades most polymers over months. Joints in UV-exposed display positions can become brittle or lose their grip before the paint shows visible damage.
|
|
Manufacturing variance
|
Injection-moulded plastic has tolerance ranges. Some kits leave the factory at the tighter end, some at the looser end. Lower-end kits may have joints that feel loose from day one.
|
|
Incorrect pose forcing
|
Forcing a joint past its designed range of motion stretches the internal socket walls. The joint may still function but will hold less tension afterward.
|
|
Storage pressure
|
Storing kits with joints under constant tension — in a box with a limb pressed against a wall — gradually deforms the joint's resting position.
|
How to Identify Loose Joints Before Fixing Them

Diagnosing which joint is actually loose prevents unnecessary disassembly. Test each joint individually before deciding on a repair approach.
Joint inspection sequence
|
Joint to check
|
Test method
|
Loose indicator
|
|
Shoulder
|
Extend the arm to 90 degrees. Release. Observe.
|
Arm drops or drifts downward within 5 seconds.
|
|
Elbow
|
Bend to 90 degrees. Release. Observe.
|
Forearm drops toward the floor under gravity.
|
|
Wrist / hand
|
Rotate the hand to a non-neutral position. Release.
|
Hand rotates back to center immediately.
|
|
Hip
|
Raise the leg slightly forward. Release.
|
Leg returns to straight standing rather than holding the pose.
|
|
Knee
|
Bend to 45 degrees. Release.
|
Lower leg drops to straight despite the bend.
|
|
Ankle
|
Angle the foot forward or back. Release.
|
Foot returns to flat neutral rather than holding angle.
|
|
Torso swivel
|
Rotate the waist 30 degrees. Release.
|
Torso springs back to center or drifts freely.
|
Tools needed for inspection
-
Fine tweezers — for gently manipulating small parts without finger-pressure distortion.
-
Small flat-head tool — for testing post tightness without scratching the finish.
-
Bright directional light — for spotting hairline stress cracks around joint sockets.
-
Instruction booklet — for confirming correct part orientation before disassembly.
Step-by-Step: How to Fix a Loose Joint

This sequence works for the majority of loose swivel and ball-socket joints in poseable plastic collector kits. Follow the steps in order. Do not skip preparation.
|
Step
|
What to do
|
|
1
|
Confirm the diagnosis — Use the joint test sequence above. Mark which joints are loose. Do not disassemble until you know exactly what needs fixing.
|
|
2
|
Gather materials — Thin PVA hobby glue, small rubber shims (cut from a latex glove or rubber band), fine tweezers, clean cotton swabs, and rubbing alcohol for surface prep.
|
|
3
|
Disassemble carefully — If the joint requires disassembly, refer to the instruction booklet for the correct disassembly direction. Most ball-socket joints release by pressing the socket walls inward gently. Do not twist.
|
|
4
|
Clean the joint surfaces — Use a cotton swab lightly dampened with rubbing alcohol. Clean both the ball and the socket interior. Any oils or debris will prevent the adhesive or shim from seating properly.
|
|
5
|
Apply the fix — Method 1 (thin PVA layer): Apply a single very thin layer of PVA hobby glue around the ball surface. Allow it to dry to near-tacky — not fully dry. Then reseat the joint. The layer adds thickness. Method 2 (rubber shim): Cut a thin strip from a latex glove. Wrap once around the ball. Reseat. Trim any visible excess.
|
|
6
|
Test tension before full reassembly — Move the joint through a small range of motion. The resistance should feel even. If still loose, add a second thin PVA layer after the first is fully dry. Do not stack layers wet.
|
|
7
|
Reassemble and cure — Complete the reassembly. If you used PVA, allow 24 hours before posing aggressively. The full cure makes the bond durable for repeated movement.
|
Non-Adhesive Alternatives for Loose Joints

Some collectors prefer reversible fixes that do not involve any adhesive material on the kit. These approaches work well for moderately loose joints.
|
Method
|
How it works
|
|
Rubber shim (no adhesive)
|
Cut a thin square from a latex glove. Place it around the ball before reseating the socket. The rubber compresses to fill the gap. Fully reversible.
|
|
Clear nail varnish layer
|
Apply one thin coat to the ball surface. Allow to dry fully. The hardened varnish adds 0.1–0.2mm to the ball diameter. Removable with nail varnish remover if needed.
|
|
Small O-ring
|
Hobby suppliers sell micro O-rings in various diameters. A correctly-sized O-ring placed around the ball post adds friction without any adhesive.
|
|
Joint re-tensioning
|
On some screw-based joint designs, a quarter-turn tightening with a micro screwdriver restores tension without any added material. Check the instruction booklet first to confirm the joint has an internal screw.
|
|
Wax tightening
|
A very small amount of carnauba wax applied to the ball surface creates a tacky friction layer. Not permanent. Needs reapplication every few months with heavy use.
|
Common Joint Repair Mistakes to Avoid

|
Mistake
|
Result
|
Correct approach
|
|
Using cyanoacrylate (super glue) on ball joints
|
Super glue fills the gap permanently and often bonds the joint completely, preventing any further movement.
|
Use thin PVA hobby glue instead. It adds friction and remains flexible after cure.
|
|
Applying adhesive to the socket rather than the ball
|
The socket walls are thinner. Adhesive on the socket interior can crack the wall when the ball is pressed in.
|
Apply all material to the ball surface only. The socket accepts it passively.
|
|
Oils from handling prevent the PVA layer from bonding evenly. The fix lasts weeks rather than months.
|
Clean both surfaces with rubbing alcohol and allow to fully dry before applying any material.
|
|
|
Over-tightening a screw joint
|
Plastic threads strip easily. Over-tightening destroys the thread and the joint can no longer be adjusted.
|
Tighten only until the joint holds a pose. Quarter-turn increments. Stop the moment resistance increases.
|
|
Stacking wet PVA layers
|
Wet-on-wet layers trap moisture and do not cure properly. The joint feels soft for weeks.
|
Allow each PVA layer to dry completely (minimum 4 hours) before testing or adding a second layer.
|
|
Forcing a fixed joint into extreme poses immediately
|
PVA-repaired joints need the full 24-hour cure before heavy posing stress.
|
Allow 24 hours after final reassembly before returning to aggressive posing.
|
How to Prevent Loose Joints in the First Place

The Marvel Infinity Saga Champion Class Iron Man MK85 and the Marvel Deadpool Wolverine Champion Class Wolverine are examples of high-articulation kits with multiple joint types. These care principles apply to any poseable collector kit in the Blokees lineup.
Storage best practices
-
Neutral pose for long-term storage. Return kits to a neutral standing position before extended storage. Joints held in a flexed position develop a ‘set’ in that position over time.
-
Away from direct sunlight. UV light degrades plastic joints before visible surface damage appears. Use UV-filtering display cases for kits in sunny rooms.
-
Stable temperature environment. Avoid storing near heat sources, exterior walls, or areas with dramatic temperature swings.
-
No stacking. Never store kits with accessories, limbs, or other items pressing against joints under weight.
Handling best practices
-
Move joints within their designed range. The instruction booklet shows the intended range of motion for each joint. Do not force beyond it.
-
Warm the kit slightly before posing. A few minutes in a warm room makes joints more flexible and reduces the force needed to move them. Cold plastic cracks more easily.
-
Support the kit during posing. Hold the nearest rigid part when adjusting a joint. Using the joint itself as a handle multiplies stress at the connection point.
-
Regular inspection. Check for loosening every three to six months if you regularly repose the kit. Early intervention is easier than a rescue repair.
Display maintenance schedule
|
Interval
|
What to check
|
|
Monthly
|
Visual inspection for any limb droop or pose drift. Correct immediately.
|
|
Every 3 months
|
Flex test each major joint (shoulders, hips). Note any that feel looser than last check.
|
|
Every 6 months
|
Full inspection including wrists, ankles, and accessory attachment points. Apply preventive thin PVA to any joint showing early loosening.
|
|
Annually
|
Full disassembly and cleaning for heavily posed kits. Check for hairline stress cracks around joint sockets.
|
When to Seek Professional Repair
Most loose joints respond to the DIY approaches above. But some damage requires hands outside the collector’s toolkit.
|
Situation
|
Why professional help makes sense
|
|
Cracked or shattered socket
|
A split socket cannot hold a PVA layer. It needs structural repair using specialty plastic bonding techniques.
|
|
Stripped internal screw thread
|
A stripped thread requires thread repair inserts or replacement post fabrication. Beyond standard collector DIY.
|
|
Broken ball post
|
The ball post is the pin connecting the ball to the limb. A broken post requires the pin to be drilled out and replaced.
|
|
High-value collector piece
|
For premium or rare kits where resale or display value matters, professional restoration preserves the finish in ways DIY repairs risk damaging.
|
|
LED or electronic joint failure
|
Kits with integrated LED features have wiring passing through joints. Any electrical failure in a joint area requires specialist disassembly to avoid damaging the LED circuit.
|
Joint Care for Marvel Collector Kits Specifically

Marvel collector kits have a distinct design approach compared to generic poseable kits. The Marvel Action Universe IP spans decades of character designs with specific proportions, accessory systems, and joint architectures. Here is what makes Marvel kit joints different from generic poseable kits.
|
Marvel kit characteristic
|
Joint care implication
|
|
Character-specific proportions
|
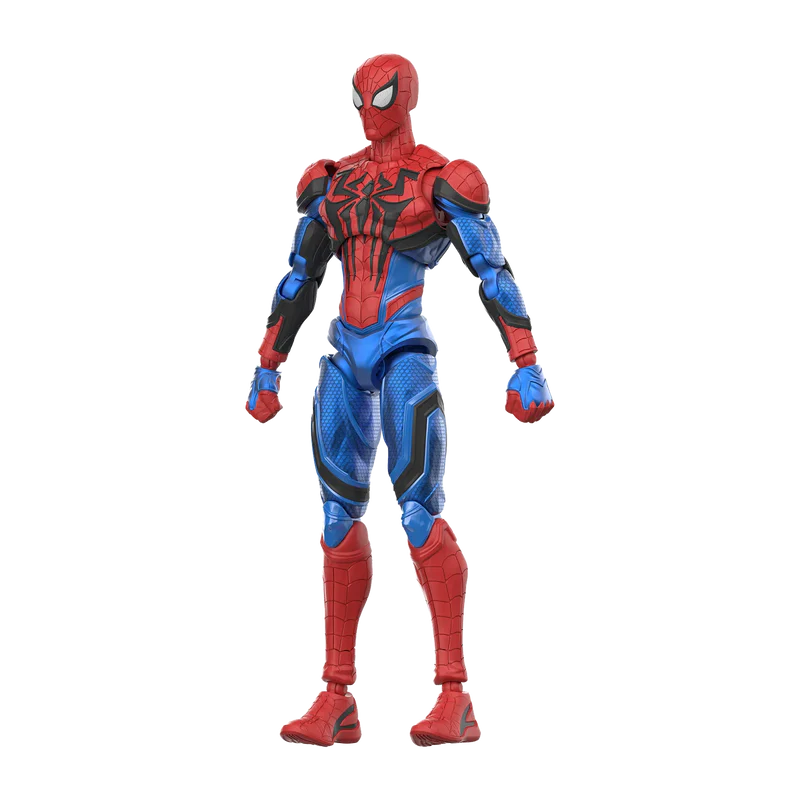
Spider-Man’s web-shooting arm needs shoulder mobility that other characters don’t. The shoulder joint on a Spider-Man kit sees more rotation range than a standing character’s joint.
|
|
Signature accessories
|
Web gauntlets, claw accessories, katana grips, and effect pieces all require wrist and hand joints to hold under accessory weight. These joints are high-risk for loosening.
|
|
LED components
|
Iron Man MK85’s LED chest arc reactor requires torso joint stability. A loose torso joint shifts the LED panel angle and breaks the display effect.
|
|
Dual head sculpts
|
Kits with two interchangeable head sculpts have neck posts that are swapped repeatedly. This is one of the highest-wear post types. Inspect neck joints at every maintenance cycle.
|
|
Mech suit joints (77-point designs)
|
High-articulation mech designs have more joints than standard humanoid kits. More joints means more maintenance points. The mech exterior panels can also create leverage that accelerates joint wear.
|
Display Tips That Protect Joints Long-Term
Conclusion
Loose joints in poseable collector kits are predictable and fixable. The right approach depends on the severity: a rubber shim for moderate looseness, a thin PVA layer for more significant slack, and professional repair for structural damage.
Prevention is easier than repair. Neutral storage positions, stable temperature, UV protection, and regular inspection every three to six months will keep most kits display-ready for years.
Browse the full Blokees Marvel catalog for the complete lineup of pre-painted snap-fit collector kits.
FAQs
How do I fix loose joints on Marvel collector kits?
The most reliable approach is a thin layer of PVA hobby glue applied to the ball surface of the joint. Allow the first layer to dry before testing. A rubber shim cut from a latex glove is a non-adhesive alternative that is fully reversible.
Can I still pose my kit after fixing the joints?
Yes. Allow 24 hours after reassembly before posing aggressively. PVA-repaired joints cure flexible, so the posing range is unchanged. The repair adds friction to the contact surface, not rigidity.
What if a joint is broken rather than loose?
A broken ball post or cracked socket is a structural issue. Contact the seller or manufacturer for support. Professional collector restoration services can replace posts and repair sockets on premium kits.
Can I use regular super glue on a loose joint?
Not recommended. Cyanoacrylate (super glue) bonds the joint permanently rather than adding friction. Even a small amount can render the joint immovable. Use hobby-grade PVA glue or clear nail varnish instead.
How often should I inspect my Marvel collector kits for loose joints?
Monthly visual inspection for any pose drift. A full flex test of major joints every three months. A complete inspection including wrists, ankles, and accessory posts every six months for regularly posed kits.
How do I keep collector kits in good long-term condition?
Store in neutral poses away from direct sunlight and heat sources. Use UV-filtering display cases where possible. Return kits to a standing position between pose sessions. Inspect every three to six months.
Can I fix tight joints the same way?
Tight joints need the opposite treatment. Apply a small amount of silicone lubricant to the joint contact point. Move the joint slowly through its full range after applying. Never force a tight joint — it indicates the parts are still undersized or have a small obstruction.
Do Marvel Rivals poseable kits have the same joint types as other Marvel kits?
Yes. Ball-and-socket, hinge, and swivel joint types appear across the Marvel Rivals Champion Class lineup. The same inspection and repair methods apply. Higher-articulation kits have more joints to check and maintain.
What tools do I need for joint repair?
Fine tweezers, a small flat-head tool, rubbing alcohol, PVA hobby glue, cotton swabs, and the kit’s instruction booklet. No specialist tools are required for most loose joint repairs.
Is professional repair worth it for Marvel collector kits?
For cracked sockets, broken posts, stripped threads, or LED-integrated joints, professional repair preserves both function and finish in ways DIY approaches risk damaging. For most loose joints, the DIY approaches in this guide are sufficient.
Sources
- IP collection reference: Marvel Toys, Blokees Marvel IP collection, used for joint type context.
- Series reference: Marvel Champion Class, official lineup of Marvel Rivals-licensed poseable kits.
- Kit joint reference: Marvel Infinity Saga Champion Class Iron Man MK85, LED chest arc reactor + LED eyes, multiple joint types.
- Kit joint reference: Marvel Deadpool Wolverine Champion Class Wolverine, 37-point articulation, claw accessory system.
- Marvel universe background: Marvel Action Universe, Wikipedia, April 2026.
- Marvel comics reference: Marvel.com, official Marvel Comics platform, April 2026.
- Series context: Marvel Action Avengers (2018–2019), Marvel.com, April 2026.
- Kit articulation reference: Marvel Rivals Champion Class Spider-Man, 42-point articulation, web gauntlet system.
- Kit articulation reference: Marvel Rivals Champion Class Venom, 42-point articulation, tentacle accessory attachment posts.


Looking for something else?

Iron Man’s Armor Evolution: Mark 1 to Mark 85 with Blokees
LEARN MORE
Wolverine vs. Deadpool: Who Would Really Win?
LEARN MORE
The Complete History of the Venom Symbiote: Origins, Hosts, Films & Family Tree Explained
LEARN MORE
The Best Marvel Rivals Merchandise to Buy Right Now
LEARN MORELooking for something else?
Spider-Man vs. Venom: Best Desk Collectibles
LEARN MORE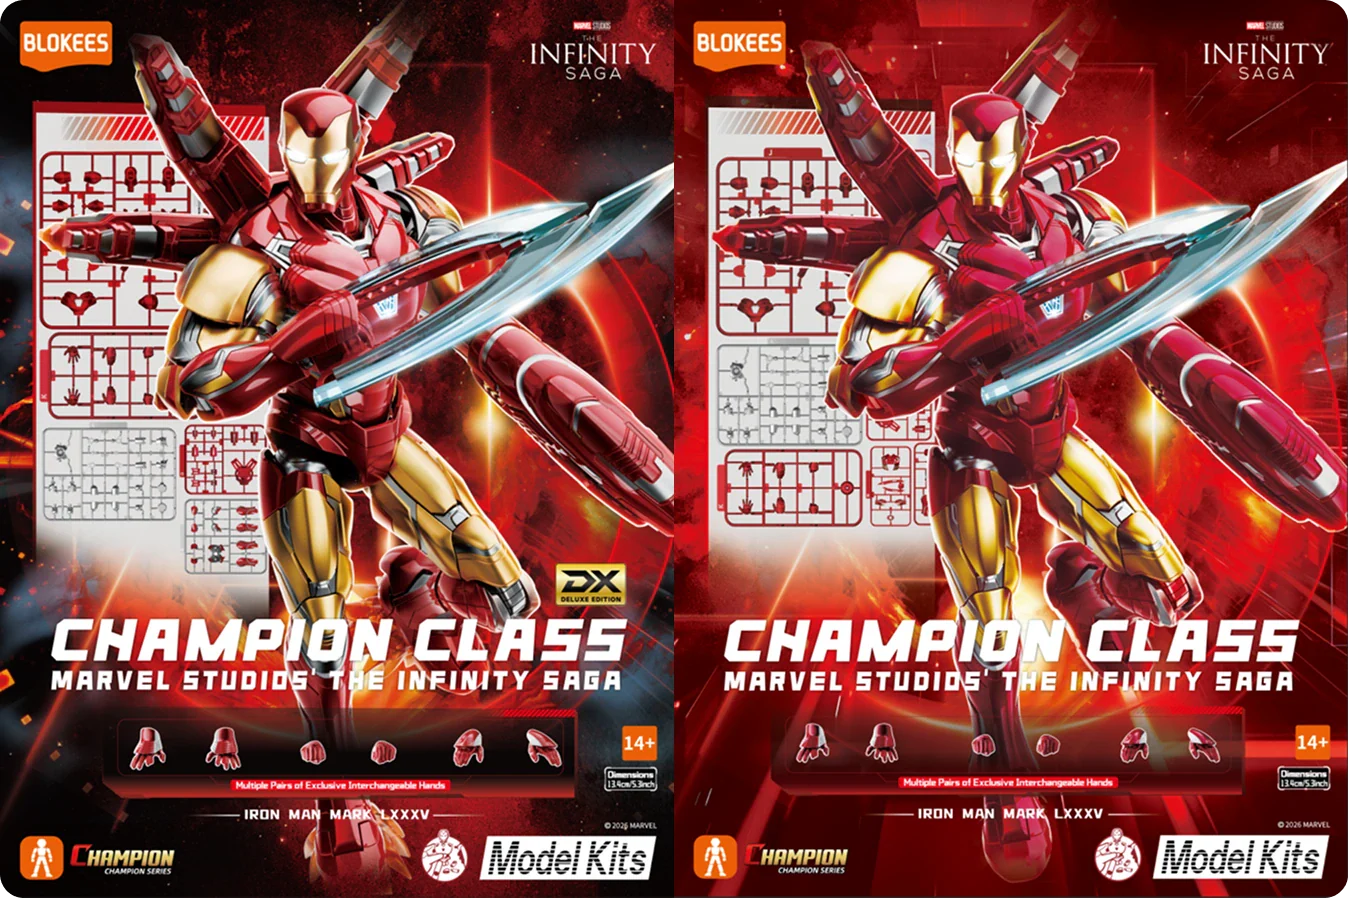
Top 5 Iron Man Action Figures for Your Hall of Armor
LEARN MORE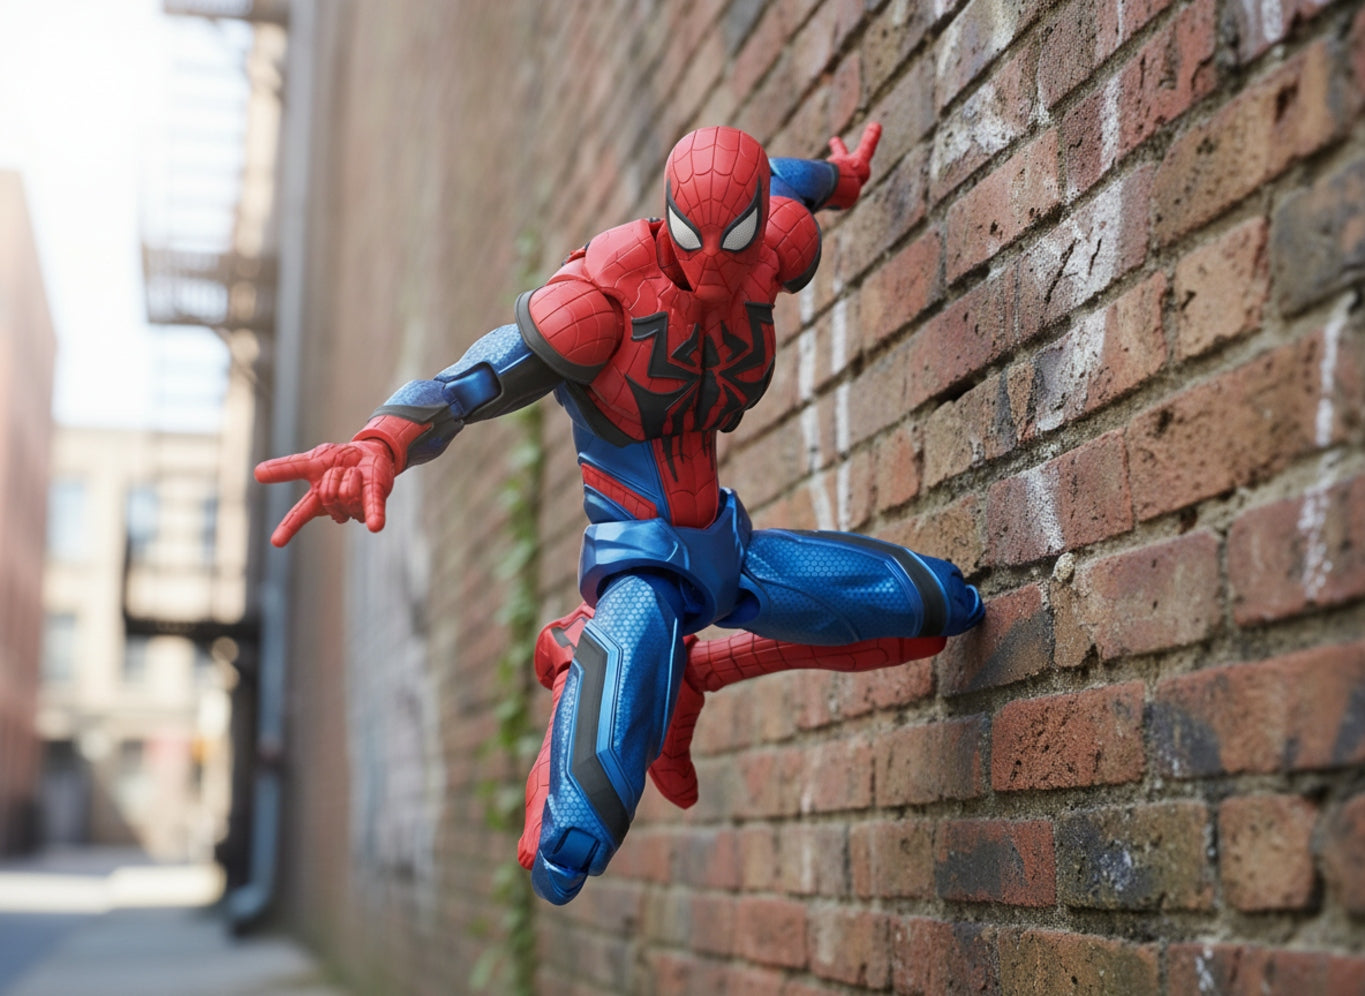
Spider-Man’s Best Alternate Suits Explained
LEARN MOREYou may also like
New


Whole Set
New


Single Box
New


Whole Set
New


Mythical Aspect Sun Wukong
Further reading

Harley Quinn's Complete Origin Story: From Doctor to Chaos Queen
Not many DC characters have traveled as far as Dr. Harleen Frances Quinzel. She started in 1992 as a one-episode sidekick in a cartoon. Three decades later, Harley Quinn is one of the best-known na...

Batman Beyond and Legendary Batman Assemble: A Guide to Two Officially Licensed Blokees DC Model Kits
The Blokees DC lineup includes two officially licensed Batman model kits that suit different collectors: the DC Champion Class 02 Batman Beyond and the DC Defender Version 01 Legendary Batman Assem...

Who Is Batman Beyond? The Dark Knight of the Future Explained
Gotham belongs to the bat. The man under the cowl never did, and Batman Beyond runs straight at that idea. Picture a neon future, decades past the Gotham most fans know, where Bruce Wayne has aged ...