How to Create a DIY Marvel Rivals Battle Diorama Display
-
1–3 Marvel character kits — Champion Class kits with pre-painted finish and articulated joints.
-
A small base or shelf area — desk corner, display cube, or wall shelf. 20–30 cm wide is enough to start.
-
A printed or handmade backdrop — city skyline, arena wall, or color gradient printed on A4 or letter paper.
-
Display risers — clear or dark risers create height and depth without cluttering the surface.
-
One light source — side lighting from a small desk lamp or LED strip adds depth to action poses.
-
A theme — rooftop battle, street fight, portal scene, or team showdown. One clear theme per display.
-
Removable adhesive — safe, non-damaging adhesive pads for stabilizing backdrops. Never use permanent glue on kits.
Choose Your Diorama Theme First
|
Theme
|
Best kits
|
Visual setup notes
|
|
Rooftop Battle
|
Spider-Man, Iron Man, Thor. Any hero with height or flight in their in-game style.
|
Use risers at different heights. Add a city skyline backdrop. Let the forward kit be the highest point.
|
|
Street Fight
|
Deadpool, Wolverine, Captain America. Close-combat grounded heroes.
|
Flat base with a street texture print or dark panel. Low risers or none. Keep the two kits close with space to read the clash.
|
|
Portal / Multiverse Scene
|
Any kit with energy accessories — Thor with lightning effects, Spider-Man with web effect.
|
Swirling gradient backdrop in blue or purple. LED light strip behind the backdrop for an in-world glow effect.
|
|
Team Showdown
|
2–4 kits from the same lineup. The Avengers trio or the Spider-Universe trio.
|
Left-right spacing. One kit slightly forward as the anchor. Facing the same direction or two opposing sides.
|
Pick the Right Kits for the Scene

|
Kit
|
Best scene theme
|
Why it fits
|
|
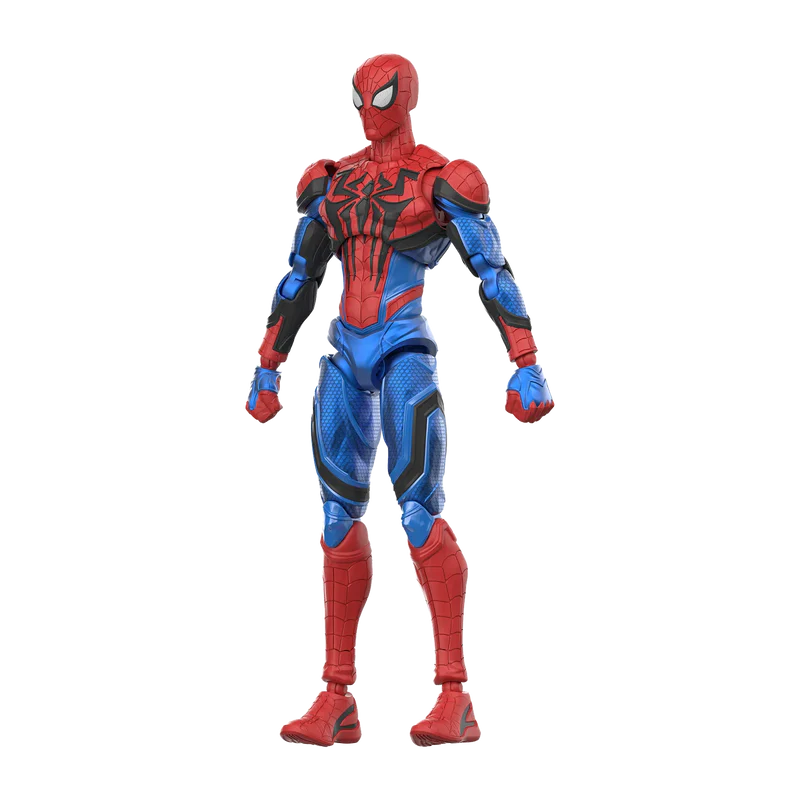
Marvel Rivals Champion Class Spider-Man
|
Rooftop battle, portal
|
42-point articulation and web-shooting effect create instant height-and-motion reads. The diagonal swing pose is the most recognizable rooftop silhouette.
|
|
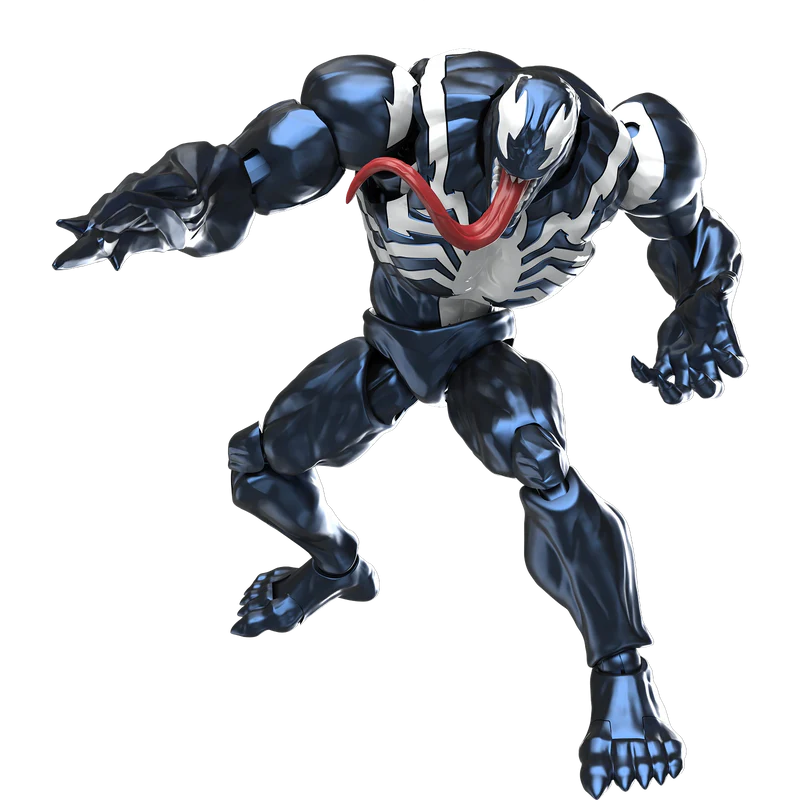
Marvel Rivals Champion Class Venom
|
Street fight, team showdown
|
5.91 inches and tentacle accessories fill the frame. Venom dominates a ground-level street fight display and creates asymmetry in a rivalry layout.
|
|
Marvel Infinity Saga Champion Class Iron Man MK85
|
Rooftop battle, portal scene
|
LED chest arc reactor and LED eyes work best in low-light diorama setups. Raised on a riser in flight-angle pose, the LED provides its own ambient display light.
|
|
Marvel Infinity Saga Champion Class Thor
|
Portal scene, team showdown
|
Stormbreaker and lightning effects with 36-point articulation. The lightning effects are visual-motion tools in a portal or energy backdrop scene.
|
|
Marvel Infinity Saga Champion Class Captain America
|
Street fight, team showdown
|
Shield and Mjolnir both included. Clean stance poses well beside Iron Man for the Endgame team display.
|
|
Marvel Deadpool Wolverine Champion Class Deadpool
|
Street fight, close-combat
|
Laser-textured suit, dual swords, dual head sculpts. The most kinetic close-combat display kit in the lineup.
|
|
Marvel Deadpool Wolverine Champion Class Wolverine
|
Street fight, duo display
|
Claw accessories and 37-point articulation. Pairs with Deadpool on the same surface for the rivalry display — same 13.4 cm scale.
|
Plan the Diorama Layout Before Adding Details

Three-zone layout
|
Zone
|
What goes here
|
Example
|
|
Front
|
The main action kit. The pose that carries the scene.
|
Spider-Man in mid-swing. Venom with tentacles extended.
|
|
Middle
|
Hero or villain focus. Second strongest pose.
|
Iron Man hovering on a riser. Thor with Stormbreaker raised.
|
|
Back
|
Background: wall, skyline, or color backdrop.
|
Printed city skyline. Dark panel. Gradient portal color.
|
Layout rules
-
One focal point. The strongest pose gets the center or front third. Everything else supports it.
-
Leave space around each kit. Crowded displays are harder to photograph. 4–5 cm between kits keeps the scene readable.
-
Use height for motion. A 2–3 cm riser under a flying or jumping kit communicates mid-air energy without any extra props.
-
Match depth to the shelf size. A 20 cm deep shelf supports a two-zone layout. A 30 cm deep shelf supports the full three-zone layout.
Materials for a DIY Marvel Rivals Display

|
Material
|
What to use
|
Display tip
|
|
Foam board or cardboard base
|
A4 or A3 sheet of foam board. Cut to shelf width. Cover with printed textures or dark card.
|
Street floor print, rooftop panel, or plain neutral grey. Keep it dark so the kits read in front.
|
|
Printed backdrop
|
City skyline. Arena wall. Game-inspired gradient. Print on A3 or poster paper. Tape to a cardboard backing.
|
Print in portrait orientation for height. Keep the lower third simple so kit bases don’t compete with ground-level detail.
|
|
Display risers
|
Clear acrylic risers (1–3 cm height range). Dark wooden risers for rooftop texture.
|
Use the tallest riser for the main focal-point kit. Keep smaller risers for supporting kits.
|
|
LED strip or desk light
|
Small clip-on desk lamp or adhesive LED strip. Single warm or cool tone.
|
Position from the left side of the display at a 45-degree angle. Side lighting adds depth to suit panel details.
|
|
Removable adhesive pads
|
Museum-quality adhesive putty or removable double-sided pads for backdrop stabilisation.
|
Never use permanent glue on kits or accessories. Removable adhesive allows pose and scene adjustments.
|
How to Set Up a Battle Scene — Step by Step

|
Step
|
What to do
|
|
1
|
Choose the scene size — Desk corner (20–30 cm wide): two-kit layout. Small shelf (30–45 cm wide): three-kit layout with backdrop. Display cube: single focal-point scene.
|
|
2
|
Place the backdrop first — Set the backdrop before adding any kits. Attach it to the back of the base with removable adhesive. The mood is set before the heroes arrive.
|
|
3
|
Add the base texture — Street floor panel, rooftop print, or neutral platform. Keep it darker than the kits. The kits should be the brightest elements in the frame.
|
|
4
|
Position the main kit — Place the strongest pose at the front center. Adjust the angle toward the viewer. This kit anchors everything else.
|
|
5
|
Add supporting kits — Keep spacing between kits. Position secondary kits at different heights if possible. Their poses should face or react to the main kit.
|
|
6
|
Add small scene details — Cracked floor print, energy-style paper cutout, or a mini wall panel behind one kit. Keep it minimal. One detail per zone is enough.
|
|
7
|
Add lighting and test the angle — Place the light source to the left of the display. Lower it to shelf height. Take one phone photo from eye level to check balance and shadows.
|
Pose Ideas for a Marvel Rivals Battle Diorama

|
Pose
|
How to set it up
|
Best for
|
|
Spider-Man swing scene
|
Diagonal body direction. One arm forward with web-shooting effect. One knee raised. Torso tilted toward the swing direction.
|
Rooftop backdrop. Left side of a two-kit rivalry display.
|
|
Iron Man flight scene
|
Kit raised on a riser. Torso tilted forward at 30 degrees. Both arms angled back or one forward. LED chest active if display lighting is dim.
|
Portal backdrop. Best as the top-level kit in a three-zone rooftop scene.
|
|
Thor power pose
|
Wide stance. Stormbreaker raised above the head or forward. Lightning effects positioned around the weapon head. Dual head sculpts — choose battle expression.
|
Works in any theme. Best elevated on a medium riser for commanding height.
|
|
Team charge scene
|
Three kits in a V-shape. Main kit slightly forward. Two supporting kits flanking left and right. All facing the same direction.
|
Team showdown theme. Use the Avengers trio or the Deadpool and Wolverine duo plus a third kit.
|
|
Rival face-off scene
|
Two kits facing each other across a gap. Bodies angled toward each other at 30 degrees, not fully front-facing. Space in the center communicates tension.
|
Street fight theme. Spider-Man vs Venom is the most natural rivalry pairing.
|
Lighting Tips for a Better Diorama Display
|
Tip
|
How to apply it
|
|
Use one main light source
|
Side lighting from the left creates shadow depth across suit panels and accessories. Front-only lighting flattens the display.
|
|
Keep the backdrop darker than the kits
|
The kits need to read in front of the scene. If the backdrop is too bright, the main pose gets lost.
|
|
Match light color to the theme
|
Warm white for a rooftop sunrise scene. Cool blue for a portal or energy scene. The light color sets the mood more than any prop.
|
|
Take photos from a low angle
|
Eye-level or below-eye-level photography makes the scene look larger. A phone camera at shelf height reads as a ground-level viewer.
|
|
Test with LED-equipped kits
|
Iron Man MK85 has LED chest arc reactor and LED eyes. In a dim diorama, these provide ambient light from within the scene — no external lamp needed.
|
Marvel Rivals and Transformers — Addressing the Search

Common Diorama Mistakes to Avoid
|
Mistake
|
Result
|
Fix
|
|
Crowding too many kits
|
The main pose gets hidden. The scene loses a clear focal point.
|
Two or three kits per display is enough. The spacing between them is part of the composition.
|
|
Busy backdrop
|
The character kits compete with the background for the viewer’s eye.
|
Keep the lower third of the backdrop plain. Use texture and detail only in the upper half.
|
|
Unstable poses before photo
|
Great action poses tip over. Photos of fallen kits are not useful.
|
Set both contact points stable before adding accessories. Test the balance before adding the backdrop lighting.
|
|
Mixing too many themes
|
Rooftop, portal, and street battle in one small setup read as confusing rather than expansive.
|
One theme per display. The scene should answer one question: where are these kits right now?
|
|
Permanent glue on kits
|
Destroys posing flexibility. Once glued, the display cannot be reconfigured.
|
Use removable adhesive for backdrop stabilisation only. Never apply adhesive to kits or accessories.
|
Conclusion
FAQs
What is Marvel Rivals?
Can you make a Marvel Rivals display at home?
What size shelf works best for a battle diorama?
Which Marvel kit should go in the center?
How do I make a diorama look like a battle scene?
Can I use LED lights for a Marvel display?
Which theme works best for a single-kit display?
What’s the best two-kit diorama pairing?
Where should I start if I’m new to Marvel model kits?
Are Transformers characters in Marvel Rivals?
Sources
-
IP collection: Marvel Toys, Blokees Marvel IP collection.
-
Series page: Marvel Champion Class, Marvel Rivals Champion Class lineup.
-
Verified specs: Marvel Rivals Champion Class Spider-Man. $19.99, 5.79 inches, 42-point articulation, web gauntlets + web-shooting effect + 3 hand sets, pre-painted, tool-free snap-fit, ages 14+.
-
Verified specs: Marvel Rivals Champion Class Venom. $27.99, 5.91 inches, 42-point articulation, Venom tentacles + attack effect hand + replacement backplate, ages 14+.
-
Verified specs: Marvel Infinity Saga Champion Class Iron Man MK85. $19.99 Standard / $27.99 DX. LED chest arc reactor + LED eyes. Ages 14+.
-
Verified specs: Marvel Infinity Saga Champion Class Thor. $19.99, 36-point articulation, Stormbreaker + lightning effects + dual head sculpts. Ages 14+.
-
Verified specs: Marvel Deadpool Wolverine Champion Class Deadpool. $19.99, 37-pt articulation, 13.4 cm, laser-textured suit, dual heads, dual swords + tactical dagger.
-
Verified specs: Marvel Deadpool Wolverine Champion Class Wolverine. $19.99, 37-pt articulation, 13.4 cm, claw accessories, dual heads.
-
Game background: Wikipedia — Marvel Rivals, April 2026.


Looking for something else?

Iron Man’s Armor Evolution: Mark 1 to Mark 85 with Blokees
LEARN MORE
Wolverine vs. Deadpool: Who Would Really Win?
LEARN MORE
The Complete History of the Venom Symbiote: Origins, Hosts, Films & Family Tree Explained
LEARN MORE
The Best Marvel Rivals Merchandise to Buy Right Now
LEARN MORELooking for something else?
Spider-Man vs. Venom: Best Desk Collectibles
LEARN MORE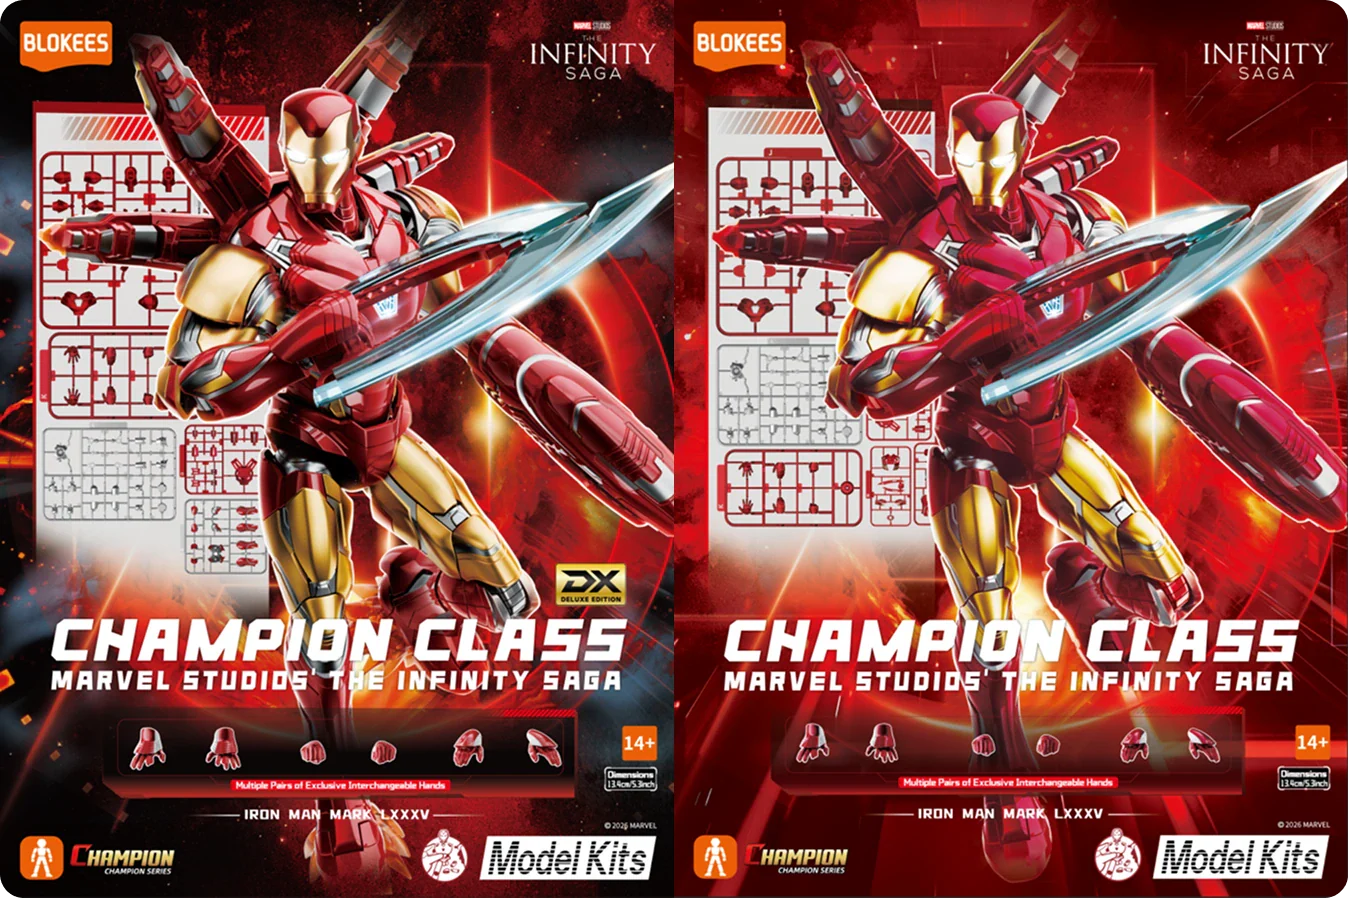
Top 5 Iron Man Action Figures for Your Hall of Armor
LEARN MORE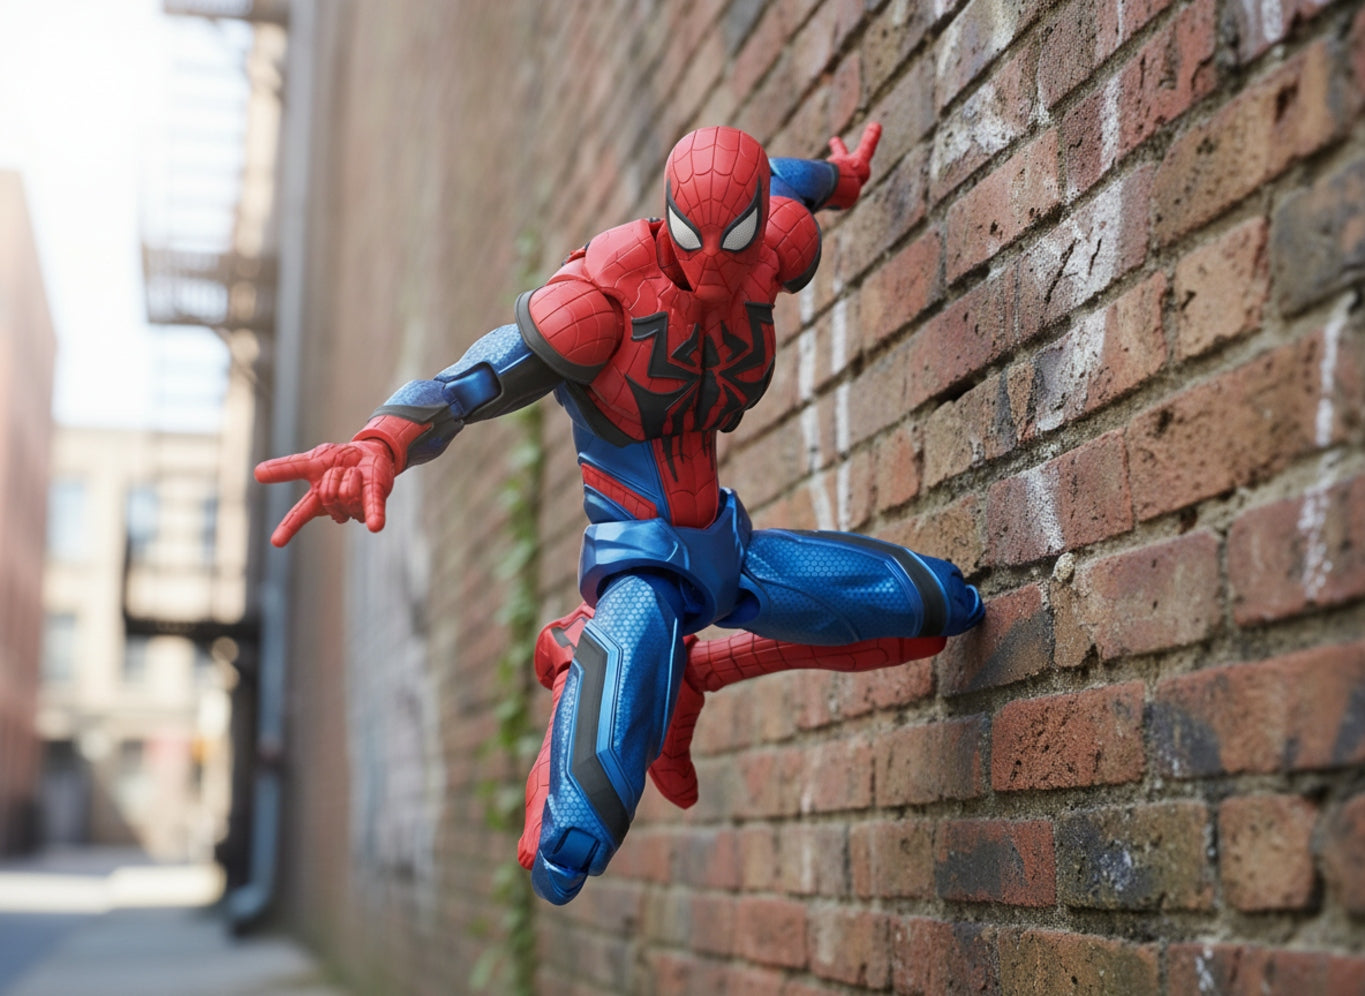
Spider-Man’s Best Alternate Suits Explained
LEARN MOREYou may also like


Further reading

Harley Quinn's Complete Origin Story: From Doctor to Chaos Queen

Batman Beyond and Legendary Batman Assemble: A Guide to Two Officially Licensed Blokees DC Model Kits