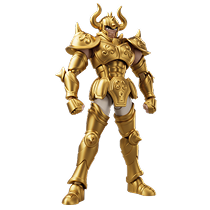
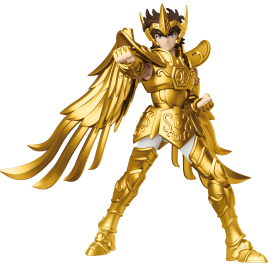
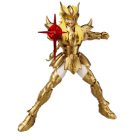
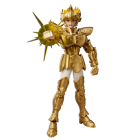
Blokees® Community


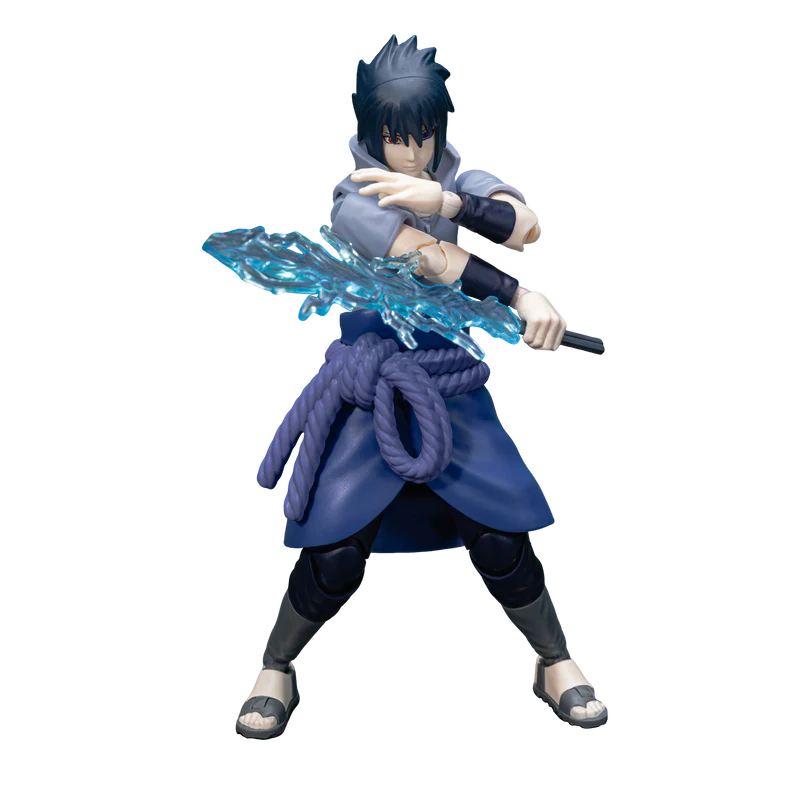
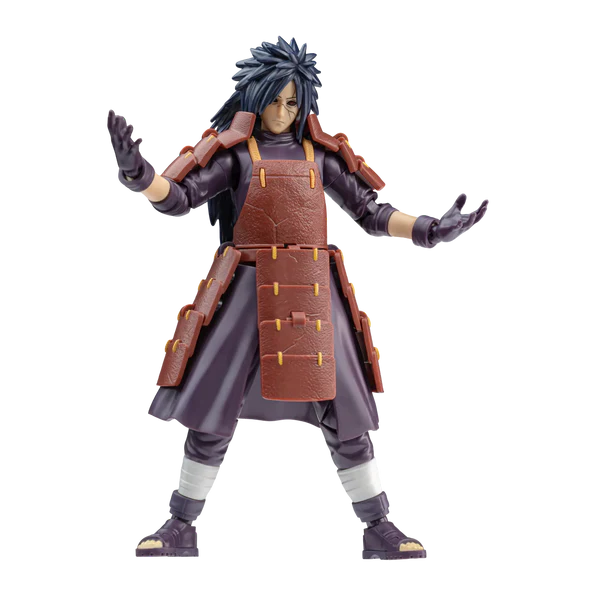
Assembling Sasuke’s Chidori Effects Parts
Sasuke Uchiha is the central rival in Naruto Shippuden — a character defined by his combat techniques and the visual impact they carry on screen and on a shelf. More at Naruto Fandom — Sasuke Uchiha.
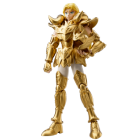
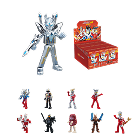
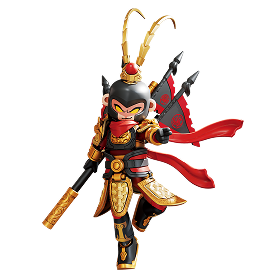
The Naruto Champion Class 04 Sasuke Uchiha kit includes super articulation with interchangeable face sculpts, interchangeable hand parts, and the Chidori sword. Each of these accessories serves a specific role in assembling a Chidori display pose.
This guide covers what’s included, how to set each accessory correctly, which poses work best for long-term display, and how to pair Sasuke with Naruto for the rivalry shelf setup that collectors want most.
Chidori?

Kakashi Teaches Sasuke the Chidori
The Chidori is a lightning-natured technique that Kakashi Hatake develops and later teaches to Sasuke Uchiha in Naruto. Its name — ‘One Thousand Birds’ — comes from the crackling sound the concentrated lightning chakra produces. Full technique documentation at Naruto Fandom — Chidori.
Kakashi originally created the Chidori as a high-speed attack combined with his own Sharingan ability. He teaches Sasuke specifically because Sasuke’s developing Sharingan provides the perception needed to use the technique safely at full speed.
Why Chidori Becomes Sasuke’s Signature Technique
Sasuke refines the Chidori into his primary offensive move throughout Naruto Shippuden. He develops the Chidori into variant applications — including the Chidori sword — making the base technique the root of his combat identity.
Wikipedia — Sasuke Uchiha covers Sasuke’s arc across the series, including the Chidori’s role in his early technique development.
Chidori vs Rasengan: The Rivalry Technique
Chidori and Rasengan are the opposing techniques that define the Naruto–Sasuke rivalry. Naruto develops the Rasengan as his primary technique; Sasuke answers with the Chidori. Their clash in the Valley of the End is the most iconic confrontation in the series.
For collectors, this two-technique rivalry is also the most requested display setup a Chidori-posed Sasuke kit facing a Rasengan-posed Naruto kit at equal shelf height.
What’s Included: Sasuke’s Chidori Kit Accessories
The Naruto Champion Class 04 Sasuke Uchiha kit includes the following accessories relevant to the Chidori display pose. All data from the official product page.
|
Accessory
|
Type
|
Connection point
|
Role in Chidori display
|
|
Chidori sword
|
Effect/weapon part
|
Wrist — Chidori grip hand
|
Primary Chidori technique accessory. Extends arm line for forward-attack or raised poses.
|
|
Interchangeable hand parts
|
Posing accessory
|
Wrist peg
|
Chidori grip hand is the correct hand for the sword attachment. Off-hand hand parts set secondary arm position.
|
|
Interchangeable face sculpts
|
Expression accessory
|
Head connection
|
Chidori combat expression distinguishes the battle pose from neutral standing display.
|
|
Display stand
|
Stability accessory
|
Waist peg
|
Required for all dynamic lunge or forward-lean poses. Distributes forward weight across the waist peg rather than the ankle.
|
|
Super articulation (80 pieces)
|
Joint system
|
All major joints
|
Enables forward-step, raised-arm, and lateral-lean Chidori stances not possible with fixed-pose kits.
|
Step-by-Step: Assembling Sasuke’s Chidori Effects Parts

Before You Start
-
Lay out all parts — remove all interchangeable hands, face sculpts, and the Chidori sword from the tray before starting. Confirm each part is present.
-
No tools needed — the Champion Class format is snap-fit assembly. Pushing any part with tools risks deforming the connection peg.
-
Identify the Chidori hand — the correct hand for Chidori sword attachment is the grip hand — slightly curved with a narrowed channel for the sword handle. Using the wrong hand causes the sword to sit at an incorrect angle or fall loose.
|
Step
|
Action
|
What to check
|
|
1
|
Attach the combat face sculpt
|
Seat the Chidori-expression face sculpt before any accessories. The head joint must be fully reset before the wrist parts are attached — posing the head after the sword is in place is harder and puts stress on adjacent joints.
|
|
2
|
Swap to the Chidori grip hand
|
Remove the standard display hand from the wrist peg. Press the Chidori grip hand straight onto the peg with even pressure. A half-seated wrist will drift outward under the weight of the sword over time.
|
|
3
|
Set the off-hand position
|
Before attaching the sword, decide the secondary arm’s position. A natural low-hanging off-hand creates a one-arm Chidori look. A forward-raised off-hand creates a two-point aggressive stance.
|
|
4
|
Attach the Chidori sword
|
Slide the sword handle into the grip hand channel from the bottom up. Confirm the blade aligns with the arm axis — the blade should extend directly forward from the wrist when the arm is raised for a forward-thrust pose.
|
|
5
|
Set the body stance
|
With sword attached, adjust the hip and torso rotation before moving the legs. Torso-first positioning gives the legs a stable base to step forward from, rather than adjusting everything at the ankle level.
|
|
6
|
Place the display stand
|
Attach the waist peg to the display stand for any pose with forward lean. The stand arm should be adjusted to the kit’s center of gravity — for a forward-thrust Chidori pose, the peg arm extends slightly forward.
|
|
7
|
Final angle check
|
View the completed pose from three angles: front, 3/4, and side. The side view reveals if the sword arm is actually forward or pulled back by hip rotation. Adjust torso rotation for the clearest sword-forward read.
|
Best Chidori Pose Ideas
|
Pose
|
Joint configuration
|
Display stand needed
|
Best for
|
|
Forward attack
|
Lead foot forward, torso rotated toward sword arm, Chidori arm fully extended ahead.
|
Yes
|
Solo display. The clearest Chidori visual read from any angle.
|
|
Valley of the End
|
Body angled toward a paired Naruto Uzumaki kit. Sword arm raised. Facing rival across the shelf gap.
|
Yes
|
Two-kit rivalry display. The classic Naruto vs Sasuke setup.
|
|
Mid-dash Chidori
|
Lead leg mid-stride forward, upper body leaning forward, sword arm leading the chest.
|
Yes
|
Dynamic shelf anchor. Highest shelf impact pose.
|
|
Sword raised
|
Neutral foot stance, sword arm raised to shoulder height rather than fully extended. Off-hand lowered.
|
Optional
|
Balanced long-term display. Lower joint stress than full-extension poses.
|
|
Neutral Chidori hold
|
Standing neutral legs, Chidori sword in grip at natural arm height. Combat face sculpt.
|
No
|
Most stable long-term pose. Lowest joint load. Good for enclosed shelf without stand access.
|
Common Mistakes When Assembling Chidori Effect Parts

Wrong Hand for the Sword
The most common assembly error: attaching the Chidori sword to the wrong hand. The grip hand has a narrowed channel specifically sized for the sword handle. Using a flat or open hand results in the sword sitting loose, tilted, or falling during minimal contact.
-
Check — confirm the grip hand is fully seated before attaching the sword. The wrist peg connection should be flush with no visible gap.
Overextending the Sword Arm
The shoulder and elbow joints have a natural stop range. A fully-extended Chidori arm pose at maximum joint extension creates sustained stress when left in place for weeks.
-
Fix — raise the sword arm to 80–85% of its extension range rather than maximum. The visual difference is minimal; the joint load reduction is significant over months of display.
Skipping the Display Stand
Sasuke’s forward-attack Chidori places a forward lean on the ankle joint. Without the waist peg stand, the kit drifts forward slowly over days.
-
Fix — always use the included display stand for any Chidori pose with forward body lean. Neutral standing poses are the only configuration that reliably holds without the stand.
Poor Center of Gravity on the Shelf
A Chidori forward-attack pose with the sword extended toward the shelf edge pushes the kit’s center of gravity toward the front. On smooth shelves, this causes gradual shelf drift.
-
Fix — shelf liner plus display stand. Both together keep the pose stable without requiring any wall anchor.
Losing Small Accessory Parts
Unused hand parts and face sculpts left loose on the shelf are small enough to fall behind furniture or get mixed with other kit accessories.
-
Fix — all unused interchangeable parts go back in the original tray immediately after each pose change. Label the tray if multiple Champion Class kits share storage space.
Protecting the Chidori Sword and Effect Parts
Avoiding Scratches on the Sword
The Chidori sword has a smooth, non-textured surface that shows contact scratches more than molded textured parts. Any surface-to-surface contact — sword touching adjacent kit or shelf wall — creates fine scratches over time.
-
Clearance — allow at least 4cm between the sword tip and any adjacent surface when displaying the full-extension Chidori pose.
-
Storage — When storing Sasuke disassembled, wrap the sword in the original foam insert rather than loose in the tray. Foam-to-sword contact leaves no marks; tray plastic contact does.
UV Protection for Clear Effect Parts
Any translucent or smooth-finish effect parts fade fastest under UV exposure. Keep the Sasuke kit and all accessories away from direct or indirect window light.
Cleaning Effect Accessories
Use a dry microfiber cloth on the sword surface only — fold the cloth to a point and draw it lightly along the blade rather than rubbing across the surface. Never use water or cleaning sprays on any effect part.
Naruto and Sasuke Display Pairings

Rasengan vs Chidori — The Classic Rivalry Setup
The rivalry display places Champion Class 02 Naruto Uzumaki in a Rasengan-forward pose on the left, and Champion Class 04 Sasuke Uchiha in a Chidori-forward pose on the right. The two kits face each other at 8–10cm gap — close enough to read as confrontational, wide enough for the accessories not to contact.
-
Equal shelf height — both kits at the same level. Height difference reads as one dominating the other, which distracts from the rivalry theme.
-
Mirrored posing direction — each kit angled 15–20° toward the other. Straight-forward facing makes the kits look parallel rather than opposed.
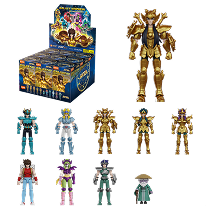
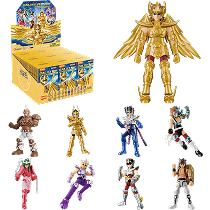
GV Wave as Rivalry Support
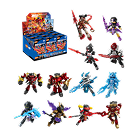
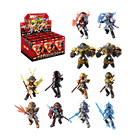
The Naruto Shippuden GV Surprise Box kits at $8.99 each work as front-row context for the rivalry display. GV01 Ultimate Bond in the foreground references the Naruto–Kurama theme; GV03 Heart of a Ninja at the Sasuke side adds the GV Sasuke variant if pulled.
Uchiha-Only Shelf
Sasuke Uchiha with the Chidori sword as the primary kit works as a standalone Uchiha-themed display without a paired rival. The visual impact of a solo Chidori pose is strong enough to hold a dedicated shelf section.
-
GV03 support — if you’ve pulled the GV03 Sasuke Uchiha, placing it beside the Champion Class Sasuke at a lower riser creates a same-character, different-scale display showing both formats.
Team 7 Desktop
Champion Class 02 Naruto Uzumaki, Champion Class 04 Sasuke Uchiha, and Champion Class 03 Minato Namikaze as a three-kit lineup creates a wider Team 7 / Hokage-era desk display. Sasuke with Chidori sword on one end, Minato in the center, Naruto on the opposite end.
Why Sasuke Remains a Centerpiece of Naruto Collections

The Rivalry’s Collector Appeal
Sasuke Uchiha’s arc tracks from Team 7 teammate to primary antagonist to reluctant ally — a longer, more ambiguous story arc than most Naruto Shippuden characters. The rivalry with Naruto gives collectors a clear display narrative: two characters who represent opposing approaches, using opposing techniques, across opposing shelf positions.
Chidori’s Visual Shelf Impact
The Chidori’s visual character — a focused forward thrust with a single arm bearing the technique — translates directly into a strong kit pose with an asymmetric, high-energy silhouette. The Chidori sword makes the effect legible as a Chidori pose at display distance without requiring knowledge of the technique.
Uchiha Character Popularity
The Uchiha clan as a whole is the most requested character group in the Naruto Shippuden collector space. Sasuke is the living Uchiha character with the most screen time in Shippuden and the only one with the Chidori in the Blokees CC lineup.
Conclusion
Assembling Sasuke’s Chidori effects parts correctly comes down to three things: the right hand for the sword grip, the display stand for any forward-lean pose, and accessories stored in the original tray rather than loose on the shelf. These three habits prevent the most common damage points.
The Naruto–Sasuke rivalry display is the most visually clear two-kit setup in the Blokees Naruto lineup. Champion Class 04 Sasuke Uchiha with Chidori sword facing Champion Class 02 Naruto Uzumaki with Rasengan is the collector standard for the series.
Full Naruto lineup at Blokees.
FAQs
Sasuke's Chidori Technique Explained
The Chidori is a lightning-nature technique developed by Kakashi Hatake and taught to Sasuke Uchiha. It concentrates lightning chakra into the hand and arm for a high-speed forward-thrust attack. Sasuke develops the technique into the Chidori sword as his primary weapon form.
The Chidori is Sasuke’s signature technique across Naruto Shippuden and the visual centerpiece of the Champion Class 04 kit’s Chidori sword accessory.
Which Sasuke kit is best for a Chidori pose display?
The Naruto Champion Class 04 Sasuke Uchiha is the recommended kit for Chidori display posing. It includes the Chidori sword accessory, interchangeable hands for the correct grip position, interchangeable face sculpts for the combat expression, super articulation for dynamic stance work, and a display stand for forward-lean Chidori poses.
The GV01 and GV03 Surprise Box kits feature Sasuke-related wave characters but don’t include the Chidori sword accessory at their scale.
How do you attach the Chidori sword to the Sasuke kit?
Swap to the grip hand at the wrist peg first. The Chidori grip hand has a narrowed channel sized for the sword handle — press it fully onto the wrist peg before attaching the sword. Then slide the sword handle into the grip channel from below upward until seated.
Confirm the blade aligns with the forearm axis when the arm is raised forward. A misaligned blade angle indicates the grip hand is rotated at the wrist rather than fully seated.
Can beginners assemble the Sasuke Champion Class kit?
Yes. The Champion Class format uses snap-fit assembly without tools. The interchangeable parts system — hands and face sculpts — is the main posing interaction and is designed for repeated swap without risk of joint damage when used within normal range.
The most useful starting tip: swap the face sculpt before attaching any accessories. Adjusting the head after the sword is in place is harder and creates unnecessary joint stress.
What scene is the Chidori pose based on?
The most-referenced Chidori display scene is the Valley of the End confrontation in Naruto — Naruto and Sasuke’s first major clash where both use their signature techniques simultaneously. Sasuke’s Chidori and Naruto’s Rasengan meet directly.
The forward-thrust Chidori pose recreates Sasuke’s attack stance from this scene. It’s the reason the two-kit rivalry display — Chidori sword facing Rasengan — resonates with Naruto collectors specifically.
How do you protect the Chidori sword from scratches?
Allow at least 4cm clearance between the sword tip and any adjacent shelf surface or kit. Store the sword in the original foam insert rather than loose in the tray when not in the display pose.
Clean with a dry microfiber cloth drawn lightly along the blade’s length. Never cleaning sprays, never wet cloth, never across-the-blade wiping motions.
Sources
- Naruto Fandom — Sasuke Uchiha — Character documentation. Ongoing updates.
- Naruto Fandom — Chidori — Chidori technique documentation. Ongoing updates.
- Wikipedia — Sasuke Uchiha — Character background and series arc overview.
- IMDB — Naruto Shippuden — Naruto Shippuden series entry. Ongoing updates.
- Naruto Champion Class 04 Sasuke Uchiha — Blokees — Official product page. Verified: $19.99, 80 pieces, super articulation, interchangeable face sculpts + hand parts, Chidori sword, ages 14+.
- Naruto Champion Class — Blokees — Official Champion Class series collection.
- Naruto Shippuden GV01 Ultimate Bond — Blokees — Official product page. $8.99, ages 9+.
- Naruto Shippuden GV03 Heart of a Ninja — Blokees — Official product page. $8.99, ages 9+.
- Naruto Toys Collection — Blokees — Official Naruto IP main collection.
Looking for something else?
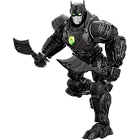
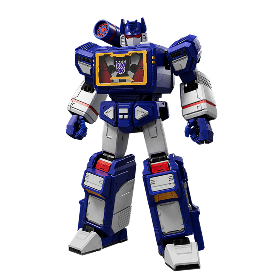
How to Clean and Maintain Your Transformers Model Kits
LEARN MORE
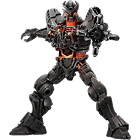
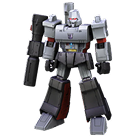
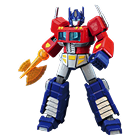
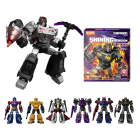
Transformers Wave 4 Checklist: Collect Them All
LEARN MORE
Marvel Rivals Roster: Every Confirmed Character So Far with Blokees
LEARN MORE
Iron Man’s Armor Evolution: Mark 1 to Mark 85 with Blokees
LEARN MORELooking for something else?

Wolverine vs. Deadpool: Who Would Really Win?
LEARN MORE
The Complete History of the Venom Symbiote: Origins, Hosts, Films & Family Tree Explained
LEARN MORE
The Best Marvel Rivals Merchandise to Buy Right Now
LEARN MOREYou may also like
New


Bo-Katan Kryze
New


Din Djarin & Grogu
New


Luke Skywalker Stormtrooper Disguise Version
New


HAN SOLO Stormtrooper Disguise Version
New


Stormtrooper
New


Darth Vader
Further reading
Adding Panel Lining to Your Naruto Kits for Anime Accuracy
The Blokees Naruto Shippuden kits come pre-coloured with solid, anime-accurate tones. Panel lining is how you take that a step further — drawing fine ink into the recessed grooves on the surface t...

Official Blokees Naruto Character Collection Guide
Twenty-five years. Naruto Shippuden characters still move faster than most of what’s been released since. That’s not nostalgia. The series solved something that a lot of anime doesn’t — every main...
Assembling Sasuke’s Chidori Effects Parts
Sasuke Uchiha is the central rival in Naruto Shippuden — a character defined by his combat techniques and the visual impact they carry on screen and on a shelf. More at Naruto Fandom — Sasuke Uchi...